To complete a first Parks on the Air activation, choose a listed park you can lawfully use, set up entirely within its permitted boundary, make at least ten qualifying contacts within one UTC day, and submit an accurate activator log. The radio work is only part of the outing: access, station placement, truthful records and safe pack-down are essential too.
Start with an easy park and equipment you have already operated at home. A short local session with a realistic contact plan is a better first project than an unfamiliar antenna, difficult hike and untested logging app all arriving together. You can make POTA contacts on bands and modes your license permits; you do not have to begin with HF voice.
Step 1: Choose a Listed Park and a Lawful Operating Spot
Use the current POTA park list or map to find a park reference, then read that park's information and the land manager's own website. Confirm its hours, access restrictions, permits, parking and rules about antennas, stakes, trees and radio operation. A POTA listing is not permission to ignore a closure or attach wire to park furniture.
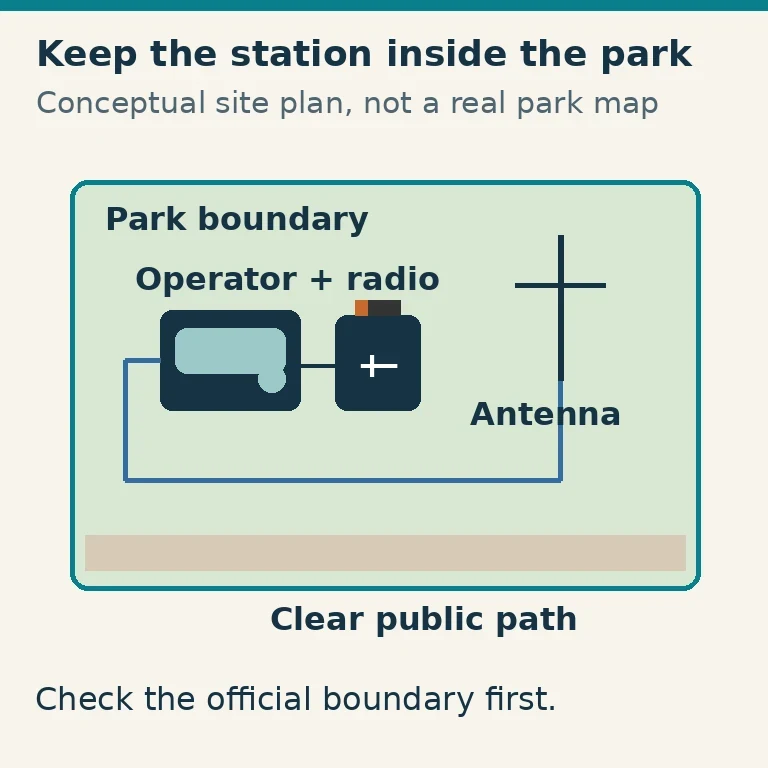
POTA requires the activator and equipment to be within the park boundary and on public property. Its map is a guide; the governing agency's boundary information is the reference when the outline is unclear. A convenient parking area next to a park may be outside it. So may a road shoulder or private inholding enclosed by a larger mapped outline.
Choose a simple single-park activation for the first outing. Save the correct reference, the official boundary information and an alternative permitted spot before leaving. If the boundary remains uncertain, resolve it with the land manager rather than guessing from a phone's blue location dot. If access is closed when you arrive, use your alternative or cancel the activation.
Vehicle-based operation is allowed by POTA when the vehicle and station meet its location rules. You can also operate at a suitable table or from a small portable setup. The operating position should leave paths, emergency access and other visitors' activities unobstructed.
Step 2: Match Your Contact Plan to Your License and Equipment
For a US operator, check the band, emission and frequency segment against your license class. Technician privileges do not provide general HF phone access. A modest VHF simplex activation can be lawful and practical when local operators are available; an HF CW, voice or data plan requires the corresponding privileges and skills. FCC Part 97 and POTA rules were checked for this guide on October 29, 2026.
Simplex means direct operation without an ordinary land repeater relaying the contact. POTA does not accept land-repeater contacts for activation credit. A repeater can be used to arrange direct contacts, and the rules separately permit satellite contacts, but a direct familiar mode is simpler for a first activation. Relayed call signs and reports do not fix a contact you could not copy yourself.
Set a realistic goal for how you will reach ten contacts. For a VHF outing, tell local club members your plan so they can listen for direct calls. For an HF outing, practice calling and logging at a clear frequency in your authorized band, and have a second suitable band or mode ready if conditions are poor. Do not assume that a spot on the internet guarantees ten people can hear you.
Step 3: Pack a Station You Have Already Tested
Bring the transceiver, suitable antenna, feed line, a charged compatible power source, correctly protected power leads and a logging method. Add the small items that make that specific station work: adapters, headphones or microphone, any key/interface, tools and the instructions you actually need. Include a paper backup log even if your normal method is electronic.
Test the complete chain before the outing. A battery that powers the radio on receive may still fail under transmit load. An antenna connector that fits may still need an adapter at the far end. Verify your planned power setting, mode, time display and recording fields, and practice entering a contact without losing track of the conversation.
Estimate battery capacity from the station's real operating draw and the intended session, leaving a sensible reserve within the battery maker's limits. Do not make ten contacts the battery's promised runtime. It may take more calling and listening than you expect.
Pack for the human outing too: water, appropriate clothing, weather information and a way to return safely. Set a latest departure time that accounts for closing hours and daylight. A logbook milestone is not a reason to stay through threatening weather or finish a hike without enough time.
Step 4: Inspect the Site and Build a Contained Station
On arrival, recheck access and the actual boundary before unloading. Walk the intended station footprint and look overhead. Do not erect antennas where a mast, antenna, feed line or falling branch could reach power lines. Choose a position that keeps radiating parts away from people according to your RF-exposure assessment and equipment guidance.
Keep guy lines, radials, batteries and cables out of footpaths. Use a suitable cable crossing or a different layout where a crossing cannot be avoided. Tape and bright markers can improve visibility, but they do not make an otherwise obstructive or electrically unsafe arrangement acceptable. Follow park rules for supports and avoid damage to trees and vegetation.
Connect the antenna system and power with the transmitter off. Check polarity, connector seating, source protection and strain relief. Confirm the radio is on the intended band and mode, with no unintended repeater offset or split setting left from another activity. Make antenna adjustments using the equipment's proper procedure and stop for abnormal SWR, heating or resets.
Step 5: Listen, Find a Clear Frequency and Make Yourself Findable
Listen before calling. Ask whether the frequency is in use in the customary manner for your mode, leave time for a reply, and move if an existing conversation is present. A frequency that looks empty on a waterfall may still be in use by a station you cannot hear. No net, activator or internet spot owns an amateur frequency.
If you have mobile data, post an accurate self-spot using your actual call sign, park reference, current frequency and mode. POTA permits self-spotting. If plans change, update the spot rather than leaving hunters to search an abandoned frequency. Without internet access, you can still call; another operator may spot you after a genuine contact.
Use a short call such as “CQ Parks on the Air, this is [your call sign] at [park reference], calling CQ.” Replace both placeholders with your real information. On CW or data, use an appropriate brief exchange you can reliably send and copy. Keep listening intervals and avoid a continuous monologue.
Step 6: Complete Each Contact and Log It Immediately
When a station answers, copy its complete call sign and repeat enough of it to confirm who you are working. Exchange the information needed for a clear contact. A signal report and park reference are common useful information; POTA itself does not require one rigid exchange script. It does require genuinely valid contacts, with the operators hearing each other rather than accepting relayed information.
If several stations call, pick one you can copy and ask the others to stand by. If a call is incomplete, request a repeat of the uncertain part. Do not turn a guessed call into a completed log entry to increase the total. Thank the station, identify appropriately and move to the next caller at a pace that leaves time to record the truth.
Record these essentials:
| Information | Why it matters |
|---|---|
| Your station call sign/operator | Identifies the actual transmitting station and operator |
| Other station's complete call | Identifies the contact you actually made |
| UTC date and time | Assigns the contact to the correct program day |
| Band and mode/submode | Describes the contact and affects duplicate handling |
| Correct park reference | Associates the log with the actual activation location |
Signal reports and notes are helpful additional records. Use the logging tool's current POTA fields correctly, especially if you are operating under a club call. For a straightforward individual activation, using your own call consistently avoids unnecessary identity complications.
Step 7: Count the Right Contacts Within the Right Day
A successful activation needs at least ten qualifying QSOs within a single UTC day, not merely ten across an outing that happens to straddle midnight UTC. In an illustrative session, six contacts before 00:00 UTC and four afterward do not produce a ten-contact day on either side. Check the UTC date as well as the local clock.
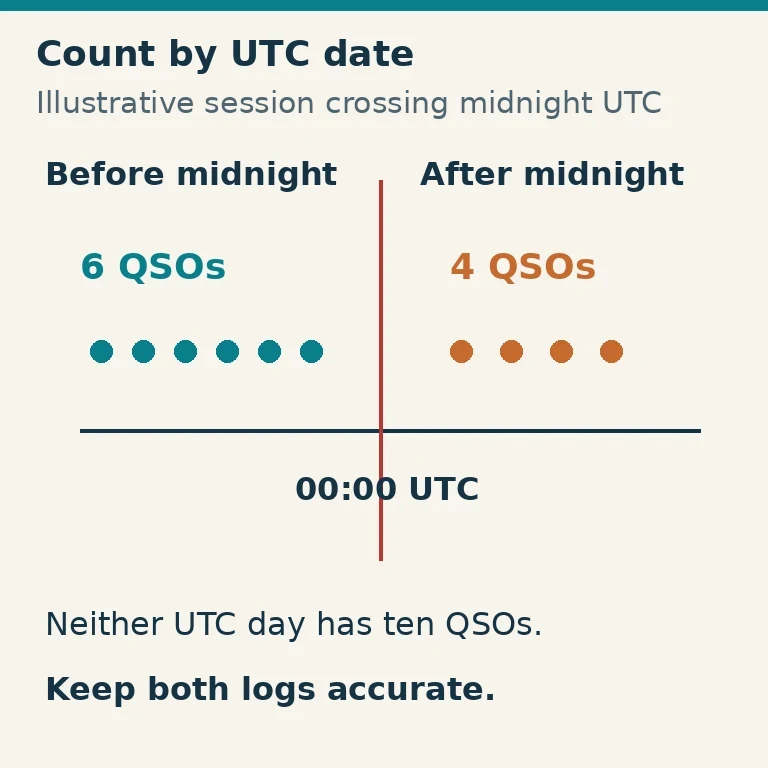
POTA's duplicate rules use a combination of contact fields, including contacted call sign, band, mode, date and park context. Repeating the same exchange with the same station on the same band and mode does not provide a reliable way to pad the count. A log containing ten lines is not necessarily ten accepted contacts.
Leave a little practical room above the minimum if conditions and time allow, but do not manufacture contacts or extend into unsafe conditions to meet a number. If you finish short, preserve and submit the valid log so hunters can still receive appropriate credit. The program explicitly encourages logs from unsuccessful attempts.
Step 8: Pack Down and Preserve the Original Log
When you finish, close the calling session, identify and mark your spot QRT where appropriate. Turn off the transmitter before dismantling the antenna and disconnect power before handling wiring. Check the entire station footprint for stakes, radials, wire fragments and litter. Leave the site as you found it.
Save or photograph the paper log and back up the electronic original before editing anything. Confirm that its timezone handling is understood. If your app records local time, export genuine UTC values using the documented conversion; do not simply label local timestamps as UTC. Retain the unmodified source so a later correction can be checked.
Step 9: Submit and Verify the Activation Log
Export the valid contacts as ADIF using the logger's POTA guidance. Review a small sample against the original log for call sign, UTC date/time, band and mode. Keep separate park contexts clear. In your POTA account, use the log-upload facility and select the correct park and any requested location information. Do not assume a filename alone sets the reference.
Read the upload result and any rejected-record details. Correct genuine export or entry errors against the original notes, then follow the current instructions for resubmitting affected data. Do not alter a real date, call sign or mode merely to make validation pass. Keep the submission receipt and check the resulting activation record rather than treating a file-selection screen as success.
Hunters do not need to upload logs to create POTA credit; activator logs provide that program record. Other systems, such as LoTW, have their own submission processes and do not replace the POTA upload.
Your first activation is complete when the station was lawfully located, the contacts are real and accurately logged, the site is safely cleared and the submitted record reflects what happened. Whether it took one easy session or a second planned attempt, retain the working station settings and one practical improvement for the next visit.