To set up CAT control, connect the radio's documented computer-control interface, install the required driver, select the matching radio and serial port in one application, and make the communication settings agree at both ends. Prove that you can read and change frequency while the radio stays in receive mode before enabling any computer-controlled transmission.
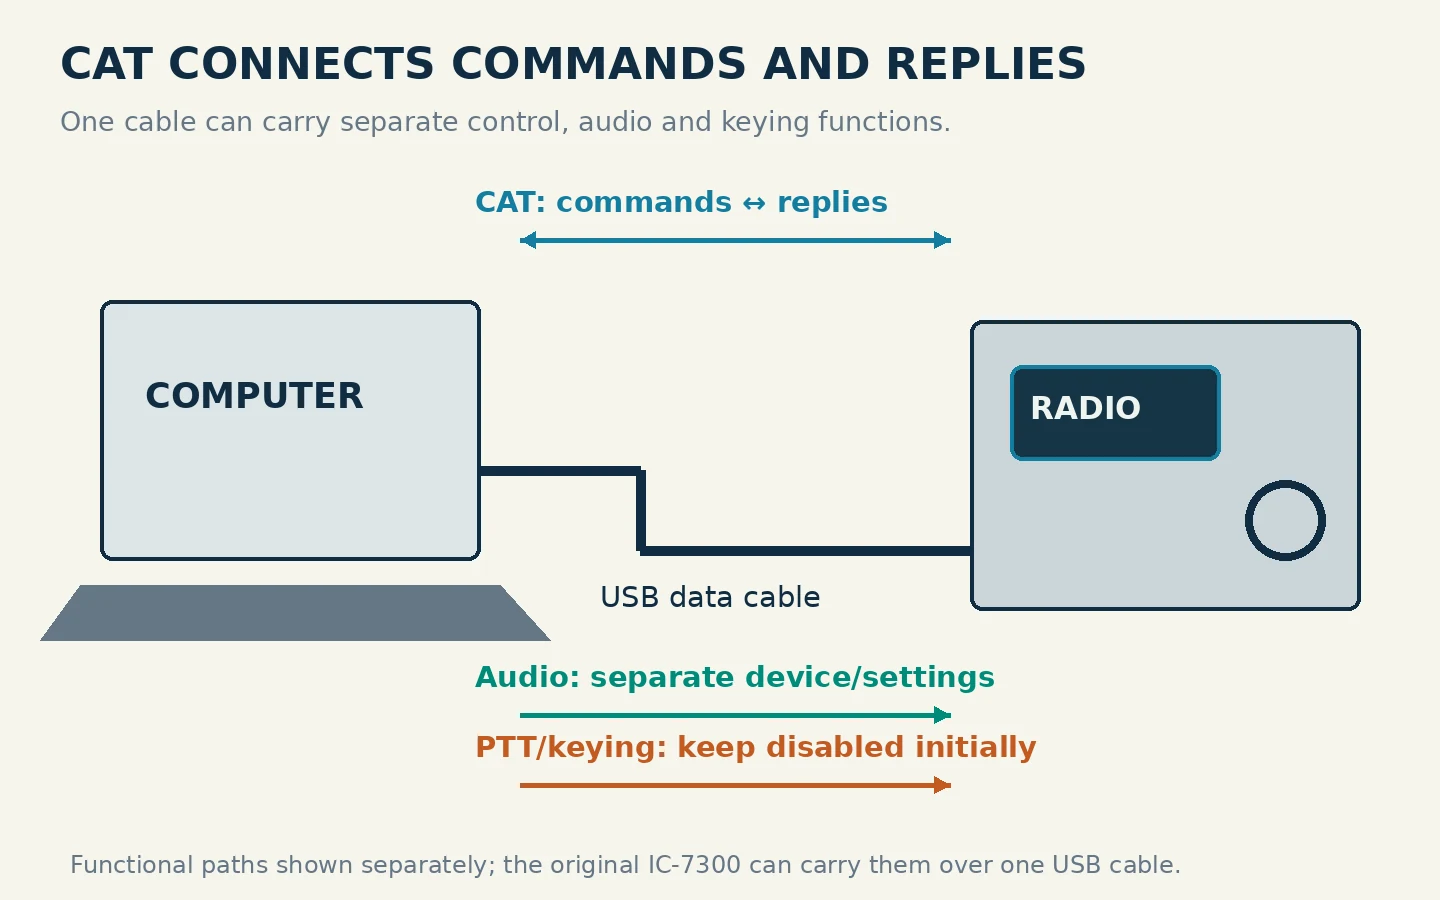
CAT, commonly expanded as computer-aided transceiver control, lets software exchange commands with the radio. It can support frequency and mode readout, tuning and other model-dependent functions. It is not automatically an audio connection, and successful frequency readout does not prove that push-to-talk or digital-mode audio is configured.
Separate Control, Audio and Transmit Keying
Think of three functional paths, even when one USB cable carries all three:
- Control: commands and replies, such as asking for the current frequency.
- Audio: received sound going to the computer and, if configured later, computer audio going to the transmitter.
- PTT or keying: a command or signal that switches the radio into transmit. PTT means push-to-talk; computer software may activate it without a physical microphone switch.
The original IC-7300 illustrates the distinction. Its USB interface can carry CI-V control, audio and configured keying functions. The manual gives USB SEND and USB keying their own settings. CI-V is Icom's control protocol; selecting it is different from selecting a computer sound device.
Start with only the control task. Leave digital-mode software's automatic transmit or tune functions disabled. A “Test CAT” command in a suitable application should test communication, whereas “Test PTT” may key the transmitter. Read the application's description before pressing either one.
Gather the Exact Radio and Interface Information
Write down the full radio model, any variant suffix, the control application and version, and the computer's operating system. Obtain the manual and driver guidance for that combination. A driver or radio profile for a similarly named successor is not necessarily correct for your radio.
Identify the physical control connection. A modern radio may expose a virtual serial port through USB. An older radio may use a separate serial connector or a manufacturer-specific control jack requiring a matching interface. A cable that fits a socket is not proof of electrical compatibility. Use the radio manual's connection diagram and the interface maker's model list; do not improvise an adapter from pin shape alone.
For the first setup, connect directly to the computer where practical and use a known data-capable cable. Avoid adding a hub, a shared control server and several applications simultaneously. A simple arrangement makes it easier to tell whether a failure is at the cable, driver or application layer.
Save or photograph the relevant radio settings before changing them. Also establish how to stop unexpected transmission using the radio's documented controls. If the radio offers transmit inhibit, enable it for the control-only exercise. Otherwise arrange the station so an accidental command will not produce an unintended over-the-air transmission; a dummy load specified for the band and possible transmitter output, together with an experienced operator's help, is useful for a new transmitting station. Do not assume turning RF power down disables transmission.
Install the Driver and Identify the Actual Port
Follow the manufacturer's installation order. Some driver packages require installation before the radio is attached. Obtain the package through the manufacturer's support page and check that it lists the radio and operating system you actually have; avoid generic driver-download sites.
On Windows, open Device Manager and inspect the Ports category. Note which port appears when the correctly installed radio or interface is connected. The port might be called COM4 or COM11, but those are examples rather than required values. Use the number assigned on your own computer.
On Linux or macOS, identify the corresponding serial device using the operating system's device listing and the manufacturer's guidance. Check access permissions if the application cannot open it. Do not apply a broad permissions change to every device merely to suppress an error.
Some radios expose multiple serial ports with different functions. Choose the one documented for CAT or CI-V. A separate audio device appearing in the sound settings is not the CAT port. If no control port appears, stop here and check the driver, cable, connector and radio power before changing software baud rates.
Match the Settings at Both Ends
In the control application's radio setup, select the exact supported radio model and the identified port. Then compare the following with the radio and interface documentation:
| Setting | What must agree |
|---|---|
| Protocol or model profile | Commands must match the actual radio, including the relevant variant |
| Baud rate | The radio control port and application must use a supported matching speed |
| Data bits, parity and stop bits | Use the documented serial format or application profile |
| Flow control | Match the interface requirements; do not enable RTS/CTS merely because it is available |
| Device address, where used | For CI-V, the software must target the radio's configured address |
| DTR/RTS behavior | Ensure opening the port does not assert a line assigned to transmit or keying |
DTR and RTS are serial control lines. Depending on the interface, they can serve different purposes, so “always turn both on” is not a reliable setup rule. Hamlib, the radio-control library used by many applications, documents separate CAT, DTR and RTS PTT choices. Its options should be selected for the actual interface, rather than copied from an unrelated station.
Close other applications that access the same physical serial port. Hamlib's FAQ explains that two applications cannot independently open the same radio port at once; a control server such as rigctld can mediate sharing later. First establish one working application and one radio.
Work Through an Original IC-7300 Example
For the original IC-7300, the Full Manual shows a USB cable from the radio's USB Type-B port to the computer and directs the user to Icom's USB driver and installation guide. Use the original-model documentation; this is not a setup prescription for the IC-7300MK2.
In the radio's MENU → SET → Connectors settings, verify that USB Serial Function is CI-V. The documented default CI-V Address is 94h. If it has been changed, match the current radio value in the application; do not silently reset it in a station containing other connected control equipment.
For a simple direct-USB setup, use CI-V USB Port: Unlink from [REMOTE]. The manual says the USB port then operates independently from the REMOTE CI-V port. Choose a supported fixed CI-V USB Baud Rate, such as 19200, and set the application to the same speed. That USB baud setting is effective when the ports are unlinked; confusing it with the separate CI-V Baud Rate setting can leave you adjusting the wrong path.
Select the original IC-7300 profile and its actual COM port in the application. Follow that application's recommendations for transceive and echo behavior. Those affect how status messages and replies are handled, so there is no benefit in changing them randomly while the port is still unproven.
For this control-only exercise, keep USB SEND, USB Keying (CW) and USB Keying (RTTY) off unless another documented part of your station requires them. This prevents those configured serial lines from being used for their respective keying functions; it does not disable every possible transmit command. Keep the earlier transmit safeguards in place.
Prove Control in Both Directions
Connect from the application without selecting PTT or tune. Confirm that it displays the radio's actual frequency and mode. Turn the radio's tuning dial a little and see whether the software follows. If it updates by polling, allow the application's normal refresh interval before assuming failure.
Next, enter a nearby frequency in the software while remaining in receive mode. Confirm that the radio's own display changes to that frequency. Return to the starting value and check mode readout as well. This demonstrates both radio-to-computer reading and computer-to-radio tuning; a static number left from a previous session does not.
Check that neither step activates the TX indicator. If opening the port keys the radio, stop the session immediately, return the radio to receive using its documented controls, and inspect serial-line and PTT assignments before reconnecting. Do not leave it transmitting while you experiment with menu settings.
If control works but no sound reaches the computer, move to the audio settings as a separate task. Select the radio's actual input/output audio devices and follow the intended application's guide. Do not replace a working CAT configuration just because its separate audio path is unfinished.
Troubleshoot by the Layer That Failed
| Failure | Start with |
|---|---|
| No serial device appears | Correct driver, data cable, connector and powered radio |
| Port appears but cannot be opened | Wrong port, another application holding it, or operating-system access permissions |
| Port opens but requests time out | Model/protocol, baud rate, serial format, address and radio control-port routing |
| Frequency reads but changes fail | Supported command/profile, active VFO and radio lock state |
| Connect immediately causes transmit | PTT method and DTR/RTS assignments; restore receive before further work |
| Works until a second application starts | Port contention; use one owner or a documented sharing arrangement |
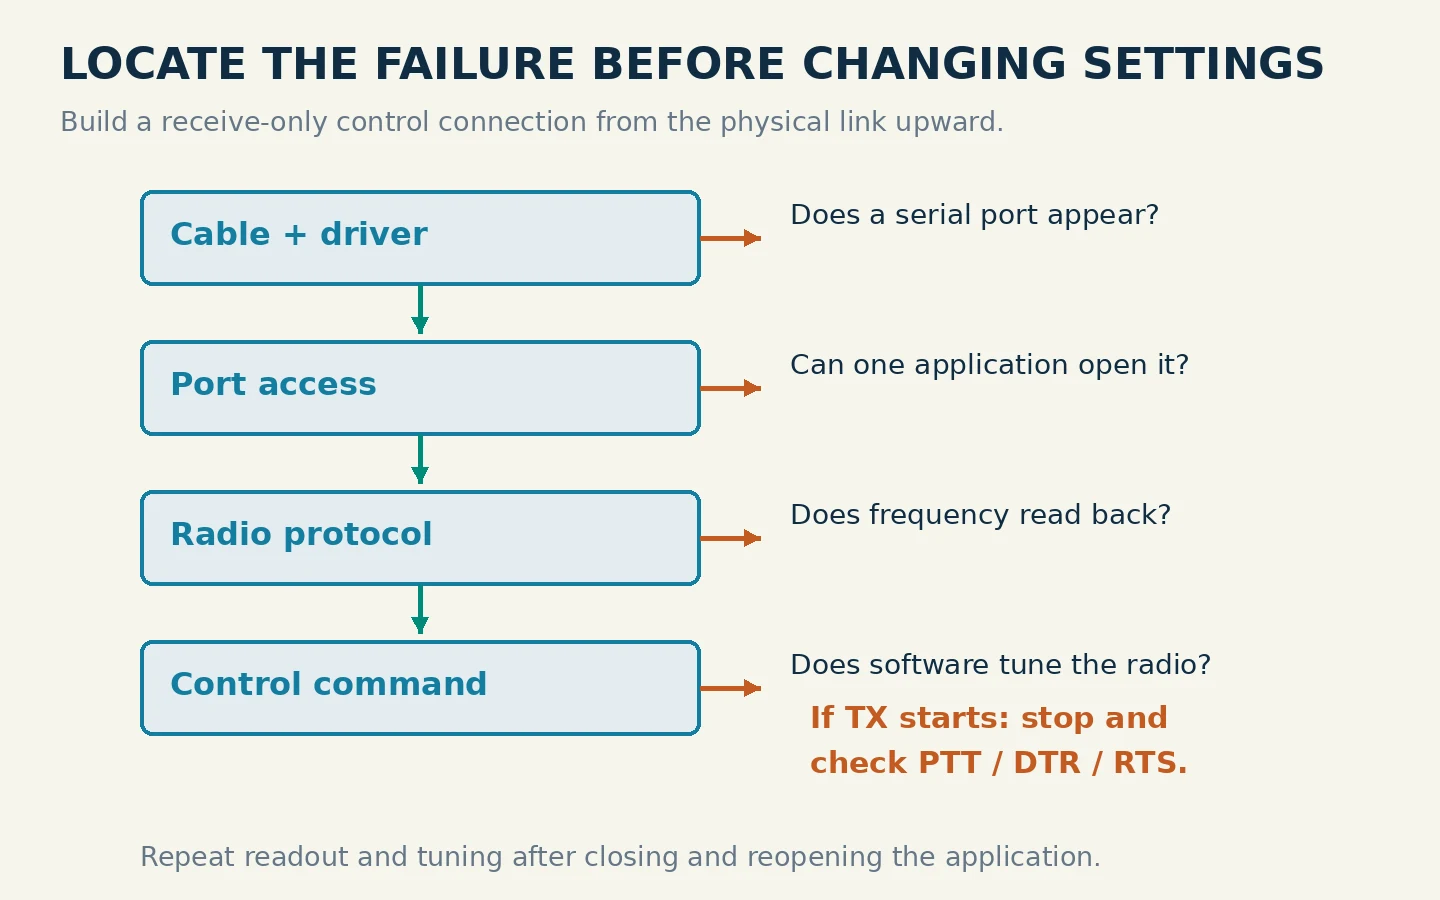
If you need help, retain the exact error message and your settings rather than a description such as “CAT broken.” Include the model, firmware if known, application version, port name, interface type and whether reading or setting frequency failed. Keep authentication details out of shared screenshots or logs.
Before calling the setup complete, close the application, reopen it, and repeat the receive-only read-and-tune checks. Record the working settings and restore any station settings you changed only for testing. A repeatable connection is more valuable than one successful test after several unexplained changes.
This finishes CAT control, not permission to transmit. For US amateur operation, FCC §§97.105 and 97.301 still bind the control operator to the privileges of their license class; checked October 29, 2026. Technician, General and Amateur Extra privileges differ, and software access does not expand them. Add computer PTT or automatic transmissions only after the intended band, mode and station operation have been checked separately.