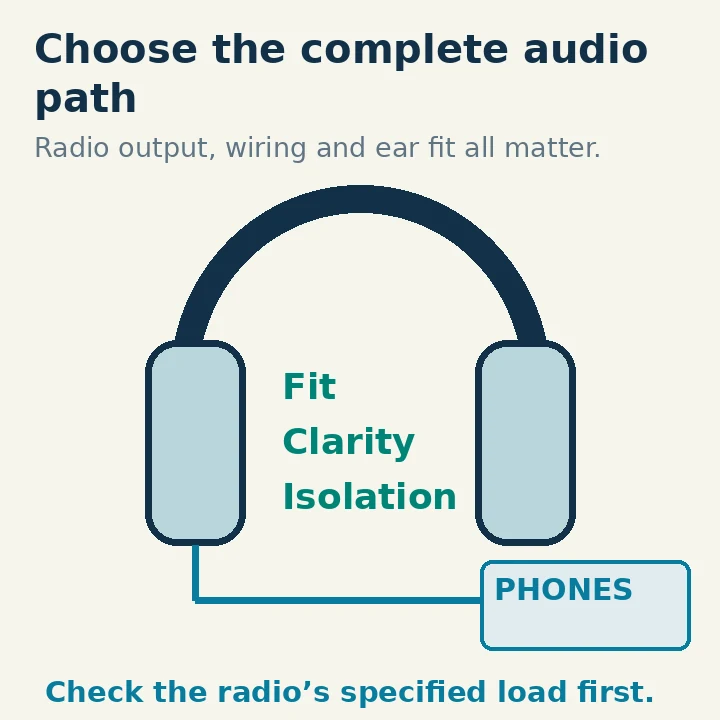
Choose ham-radio headphones by starting with the radio's headphone output, then checking speech or CW clarity, connector wiring, comfort and the noise around your operating position. A large frequency-range number or high price does not establish that you will copy a weak call sign more reliably.
For a first station, a compatible wired pair is a useful baseline because it avoids batteries, pairing and wireless audio routing. Add features only when they solve a specific operating problem. This is a selection method rather than a ranking of models.
Decide What the Headphones Need to Do
Write down your main task before shopping. A home SSB operator may want clear speech without disturbing the household. A portable operator may need some awareness of people nearby. A CW operator needs a comfortable tone and manageable cable movement. Someone using two independent receivers may want separate left and right audio.
Those tasks can lead to different choices. Strong isolation can help in a noisy room but make nearby conversation harder to notice. An open design can be comfortable in a quiet space but leak sound. A boom microphone adds transmit-audio, wiring and push-to-talk requirements that ordinary receive-only headphones do not have.
Also decide what you will connect to: the transceiver's PHONES jack, a computer interface, an external audio processor or a separate headphone amplifier. Compatibility must be checked at the output you will actually use. A computer interface's headphone specifications cannot be substituted for the radio's.
Read Impedance and Sensitivity Together
Headphone impedance, expressed in ohms, describes their electrical load. Sensitivity describes acoustic output for a stated electrical input. Shure's specification guide explains sensitivity in dB SPL per milliwatt and warns that a higher impedance number does not itself mean better sound.
The radio needs to drive the headphones to an adequate level without being overloaded. Both the available output and the headphone sensitivity matter. Two pairs with the same nominal impedance can reach different loudness at the same control setting. Conversely, a high-impedance pair is not automatically unusable, but may not reach the level you need from a particular small output.
Consult the matching radio manual rather than applying a universal shopping rule such as “all ham headphones must be 32 ohms.” The original IC-7300 manual, for example, specifies headphones with 8–16 ohms impedance and states 5 mW output into 8 ohms. That is a concrete equipment specification, not a recommendation to connect every other radio to the same load.
Distinguish the headphone's impedance from the amplifier's output impedance. A manual can list the intended load in a section titled PHONES, while a general audio article discusses the amplifier's own source impedance. Treating those two numbers as though they name the same property can produce a bad comparison.
If the radio maker does not document your proposed load, ask its support team or choose a pair explicitly intended for that radio. Do not assume a resistor adapter or external amplifier is necessary before you have established the actual compatibility problem.
Verify the Connector and Channel Arrangement
Connector diameter is only the first check. A 3.5 mm plug can carry mono audio, stereo audio, or headset audio plus microphone contacts. A 6.35 mm adapter changes the physical size; it does not automatically convert the wiring or impedance.
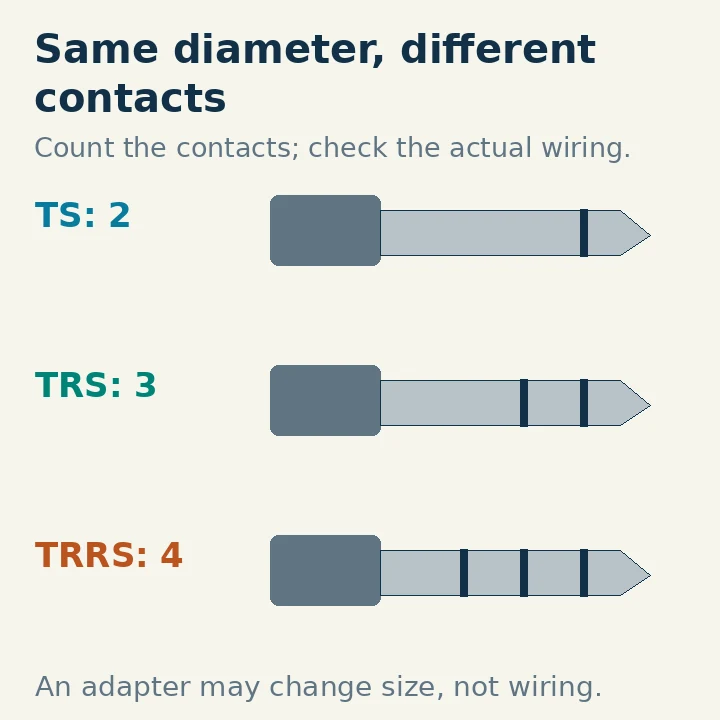
A TS plug has tip and sleeve contacts. A TRS plug adds a ring. A TRRS headset plug adds another ring, commonly for microphone and ground arrangements that vary by standard. The connector drawing makes the contact count visible. Check the radio's manual before inserting a mono plug into a stereo output or adapting a phone headset.
On a single-receiver radio, stereo headphones may receive the same mono audio in both ears. On equipment supporting dual-receiver or binaural audio, the left and right channels can have a distinct purpose. Do not combine two amplifier outputs with a simple shorting adapter to make mono sound. Use the manufacturer's approved wiring or a suitable combining circuit.
The original IC-7300 manual describes a standard stereo headphone connection. Its external-speaker jack is a different output with different specifications; it should not be treated as a second interchangeable PHONES socket.
If you want a boom microphone, verify the microphone separately: element type, sensitivity, impedance, bias, connector pinout and PTT wiring. A receive-compatible headphone section does not prove that the attached microphone can be connected safely to the radio.
Listen for Information, Not Impressive Bass
Frequency range tells you the span of frequencies a product can reproduce. Frequency response describes how strongly different parts of that span are reproduced. Shure distinguishes those terms explicitly. A very wide advertised range says little about whether speech consonants will be clear at your station.
Use representative material when comparing. Try a weak but readable SSB station, a clear local voice and a CW tone at the pitch you normally use. Keep volume moderate and as comparable as practical. A louder pair can seem more detailed simply because it is louder.
Listen for call-sign letters, similar-sounding numbers and the ability to follow a whole phrase without strain. Strong bass can sound full without improving those tasks. An overly sharp presentation may make hiss tiring. A narrow communications response may suit speech while being less useful for listening to music or a wideband recording.
Keep the receiver's filter and noise-reduction settings steady during a headphone comparison. Otherwise, you may attribute a processing change to the headphones. If possible, repeat the comparison over several speech phrases rather than deciding during one fading syllable.
Choose Isolation and Comfort for the Room
Closed-back earcups and well-fitting ear tips provide passive separation from some room sound. Open designs allow more exchange with the room. Judge that tradeoff in the actual operating environment: a quiet room and a crowded event do not create the same need.
Active noise cancellation, or ANC, adds powered processing. It should not be confused with the radio's DSP noise reduction. ANC addresses sound reaching your ears through the listening environment and headphone system; radio NR processes the received audio. Neither feature is evidence that an RF signal has improved at the antenna.
Try the fit with your glasses, normal seating position and any hat you wear outdoors. Check whether the cable reaches without pulling, whether the plug bends sharply at the radio, and whether you can turn your head without moving the equipment. Replaceable cushions and cables can matter more over time than an extra advertised frequency-response octave.
During a trial, include enough time to notice pressure and heat. If a seal depends on pressing painfully against your glasses, it is a poor fit even if the specifications look suitable. Where hearing people nearby matters, choose a setup that preserves that awareness instead of relying on someone to tap your shoulder.
Put Optional Features Through an Operating Test
Wireless audio may be convenient for moving around, but check delay, reconnect behavior and what happens when the battery runs low. Delay can be particularly distracting when monitoring your own keyed or spoken audio. A receive-only portable session and live CW sidetone monitoring have different tolerances; test the intended use rather than assuming one review covers both.
A separate volume control can be convenient, but verify that it does not create unpredictable left/right balance or make a channel disappear when touched. If the headphones include their own sound processing, compare it off and on so you can separate its effect from the radio's processing.
For two-receiver operation, deliberately identify which receiver feeds each ear. Turn one receiver down, then the other. A stereo adapter that duplicates a mono feed may work perfectly for a single receiver but defeat the reason you chose stereo headphones.
Commission the Chosen Pair Carefully
Turn the radio's audio down before plugging in. Connect the correct adapter, raise the level gradually, and test both ears with a stable received signal. Confirm that moving the cable gently does not interrupt sound or key the transmitter through an incorrectly wired headset adapter.
Keep the level comfortable rather than using loudness to overpower an unresolved noise problem. Stop if the sound is painful, suddenly distorted or unexpectedly loud. Lower the control before unplugging or changing an adapter.
Finally, retain the useful selection facts: radio model and jack, headphone impedance and sensitivity specification, adapter wiring, and the operating situation in which the pair worked. Your best choice is the one that fits that complete arrangement and helps you copy reliably for the time you actually spend at the radio.