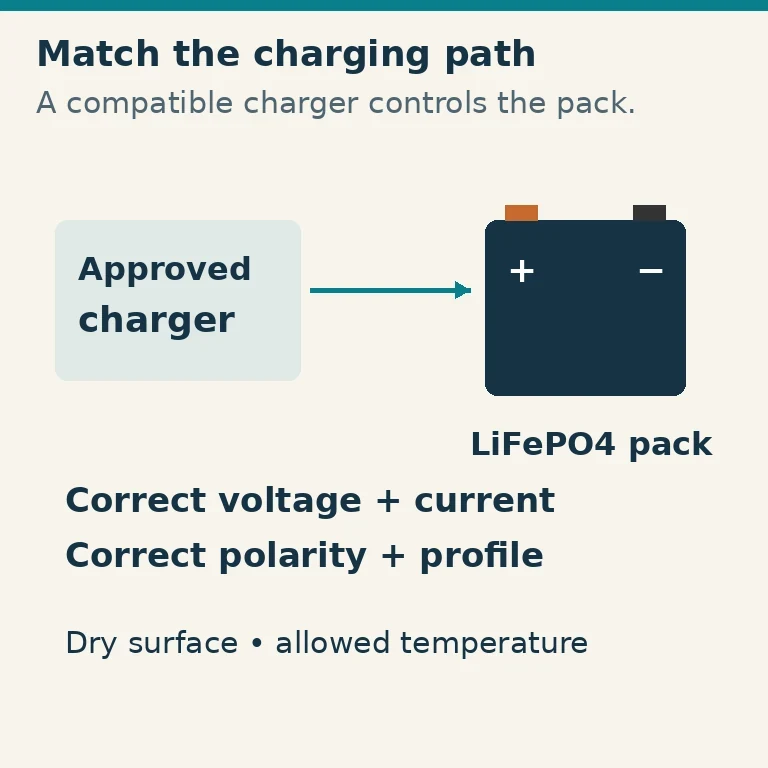
Charge a finished LiFePO4 radio battery with a charger explicitly approved for that pack's chemistry, series-cell count, charge voltage and current. Check the pack's charging-temperature limits before connecting it, confirm polarity, and charge on a dry, stable surface away from combustible material. A plug that fits, a “12 V” label or a built-in battery management system does not establish that a charger is suitable.
The useful first goal is a repeatable charge with a known pack and its approved charger. Building a charger, opening a battery case and recovering damaged cells are separate jobs. For a beginner's portable station, an assembled pack with its matched charger removes several avoidable compatibility decisions.
Read the Pack Label Before the Charger Label
LiFePO4 means lithium iron phosphate, a lithium battery chemistry with its own charging requirements. It is different from both lead-acid and other lithium chemistries. Identify the exact battery model and find its current manual or datasheet. Record the nominal voltage, capacity in amp-hours, permitted charge voltage, maximum charge current, charging-temperature range and connector polarity.
Many radio packs described as 12 V are four cells in series, often called 4S, with a nominal voltage of 12.8 V. Their full-charge voltage is higher than nominal. That does not make every charger marked 12 V suitable, and it does not make a charger for a different cell count acceptable. The manufacturer's actual pack specification takes precedence over a familiar rule of thumb.
For example, NPP's LFP-series manual describes a constant-current stage followed by a 14.6 V constant-voltage stage for its stated charging procedure, and a 0–45°C charging environment. Those are that manufacturer's instructions, with the battery datasheet still required. They are not universal settings for every pack bearing the LiFePO4 name. Bioenno's charging guidance separately emphasizes a compatible charger and warns against treating lead-acid charging behavior as interchangeable.
If a label lists only discharge temperature, you still need the charging limit. A pack able to run your radio below freezing may not be allowed to accept a charge there. Likewise, its maximum discharge current is not its permissible charging current.
Match the Complete Charging Specification
Compare the pack and charger side by side before plugging either into the other:
| What must match | What to verify |
|---|---|
| Chemistry and series-cell count | The charger supports this LiFePO4 pack, rather than merely “lithium” |
| Charge voltage and profile | The stated voltage and termination method meet the pack instructions |
| Charge current | The charger's maximum output does not exceed the pack's permitted charge current |
| Connector and polarity | The positive and negative contacts match, including any adapter |
| Input and environment | The charger supports your AC supply and its actual dry, ventilated operating location |
A charger does not need to deliver the largest current printed on the battery. A lower approved current can mean a longer charge. Conversely, the number of amp-hours does not authorize an equal number of charging amperes. For an illustrative 10 Ah pack whose datasheet allows at most 3 A charging, a 5 A charger is unsuitable even if its voltage and connector match.
Do not use an automotive charger's desulfation, equalization, repair or recovery mode unless the battery maker explicitly permits that exact behavior. Those labels describe algorithms, not compatibility. A selectable charger must be locked to the correct profile before use; a lead-acid default that returns after a power interruption is a configuration problem worth resolving before leaving home.
The BMS, or battery management system, monitors and protects the pack against defined conditions. It is a final protection layer, not a substitute for a regulated compatible charger. Deliberately relying on repeated protection trips is not a normal charging method.
Understand What a Normal Charge Does
In a typical constant-current/constant-voltage, or CC/CV, charge, the charger first limits current while battery voltage rises. When it reaches the specified voltage ceiling, it holds that voltage while current tapers. The charger then finishes according to its termination logic and the battery instructions. A changing current near completion can therefore be normal; it is not a reason to turn the voltage up.
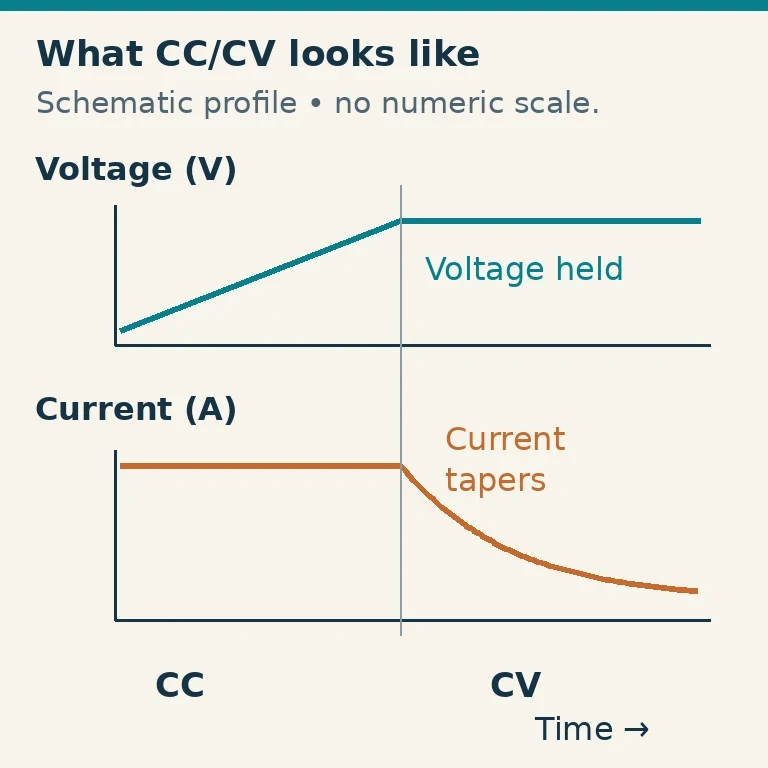
This also explains why a simple capacity calculation is only a rough lower-bound planning aid. If an illustrative 10 Ah pack genuinely needs 5 Ah restored, 5 Ah divided by 2 A is 2.5 hours at a constant 2 A. The taper, initial state, charger behavior and losses affect elapsed time. Do not turn that arithmetic into a promised completion time or use a timer to override the manufacturer's termination method.
Use the charger's documented status indications. A green lamp can mean complete, standby, disconnected or a fault on different products. Read what it means for this charger. LiFePO4 voltage can remain relatively flat over much of the discharge range, so a single resting voltage reading is not an exact fuel gauge.
Set up the First Charge Deliberately
Inspect the case, leads, insulation and connectors before charging. Stop if the battery is swollen, cracked, wet, leaking, unusually hot or smells abnormal, or if a connector is scorched. Do not open the case to find out whether it is “only one bad cell.” Contact the manufacturer or an appropriate battery professional.
Place the pack and charger on a stable, dry, noncombustible surface with the ventilation specified by their manuals. Keep them clear of paper, fabric and exits. Remove loose metal objects that could bridge terminals. Do not bury a warm charger beneath a go-bag or seal a non-weatherproof charger inside a damp battery box.
For the first charge, disconnect the radio and other loads. Then follow the charger's specified connection sequence. Some products call for the battery connection before AC power; others give a different order. There is no benefit in replacing the actual manual with a universal connector ritual. With the charger unpowered as its instructions require, check connector identity and polarity before mating it. Do not force a connector or improvise an exposed-wire adapter.
After starting the charge, observe the documented status and check for unexpected heating, noise or cycling. Attend the initial charge so you can recognize the normal behavior of this pack/charger pair. If something is abnormal, stop using the equipment and disconnect it only when safe to do so. For smoke or fire, move people away and call emergency services; do not handle a failing pack to save the radio.
At completion, follow the specified shutdown/disconnection order, inspect the connections and store the charger where the profile and cable cannot be confused with another battery's equipment. Labeling a matched charger with the battery model is a simple way to preserve that pairing.
Let Temperature Decide Whether Charging Can Start
Check the temperature of the battery itself, not just the room. A pack brought from a freezing vehicle may still be cold internally after its case starts to feel warmer. Let it reach an allowed temperature naturally in a suitable dry location, and follow any condensation guidance. Do not use a heat gun, open flame or improvised heater to hurry it.
An advertised low-temperature cutoff is useful only within its documented behavior. Some batteries inhibit charging; others have an integrated heating system. Neither feature should be assumed from the chemistry name. Check whether a heater needs external power, whether it warms the cells before accepting charge and which instructions govern the transition.
Likewise, do not charge a sun-heated pack simply because the air is comfortable. The NPP manual's 0–45°C example illustrates that charging has both a lower and upper boundary. Use your pack's limits, rather than borrowing those numbers as a new specification.
Troubleshoot a Pack That Will Not Charge
Start with observations instead of repeated restarts. Confirm AC input, the correct charger profile, secure undamaged connectors and an allowed battery temperature. Read the charger and battery fault indications. A disconnected pack, reversed adapter or protective cutoff can look like an empty battery when viewed only through a charger lamp.
If the battery is below its permitted state or the BMS has disconnected, use only the manufacturer's documented recovery procedure for that exact pack. Do not parallel it with a charged battery, bypass the BMS or use an automotive jump starter to force current into it. Bioenno expressly warns against using lithium jump starters on its LiFePO4 batteries.
If charging starts and stops repeatedly, discontinue the attempt and record the status pattern, model numbers, temperature and recent operating history for support. A warm connector deserves inspection with power removed; increasing charge current makes a poor connection's heating problem worse.
Treat Solar, Vehicle Power and Storage as Separate Configurations
A solar panel needs a compatible charge controller with the proper battery profile and limits. Do not connect an unregulated panel directly to the pack. Vehicle charging similarly needs an arrangement approved for the battery and vehicle; an alternator or accessory socket is not automatically a LiFePO4 charger. A suitable DC-to-DC charger can regulate that path when properly specified and installed.
Charging while running the radio is also product-dependent. A load can interfere with the charger's completion sensing or exceed a connector's intended use. For the beginner configuration here, charge with the radio disconnected. Add simultaneous operation only when the battery, charger/controller and wiring instructions explicitly support it.
For storage, follow the pack's prescribed state of charge, temperature and inspection interval. Do not automatically leave it on a lead-acid float charger for the winter. Protect terminals and retain the model-specific instructions. A safe routine is one you can repeat without guessing: correct pack, correct charger, correct temperature, verified connections and documented completion.