WSPR lets amateur stations report where a very weak, precisely timed radio signal can be received. It is useful for exploring propagation and checking whether a small station is getting out. You transmit a short identification message, other stations decode it, and reception reports can appear on a map. You do not exchange a normal conversation or complete a two-way contact simply by appearing there.
The name means Weak Signal Propagation Reporter, usually pronounced “whisper.” A sensible first session is receive-only: get the clock, audio and frequency settings right, decode some stations, and then decide whether your license and equipment allow a modest transmitting trial.
What a WSPR Report Actually Tells You
A basic WSPR message carries a callsign, a four-character Maidenhead grid locator and a power value. The receiver adds information such as its own identity, time, frequency and signal-to-noise ratio, or SNR. Software can send these reception records to a reporting network when internet reporting is enabled. The radio path itself travels over the air; the internet carries the resulting reports.
A report from a distant receiver means that particular receiver decoded your message at that time. It does not mean you could hear that station, work it on voice, or reproduce the result tomorrow. WSPR uses a narrow, slowly transmitted signal and substantial decoding gain. A signal below the audible noise can still decode.
Likewise, an empty map is not proof of a broken transmitter. There may be few active receivers on that band, propagation may favor another direction, or the reports may not have reached the database. Inspect local software results as well as the map.
Assemble a Simple First Station
For a conventional computer-and-transceiver setup, you need a stable SSB-capable radio covering your chosen band, an appropriate antenna, and an audio connection between the radio and computer. Many radios provide USB audio and computer control through one cable; others need an interface. Follow the radio's connection instructions rather than assuming a USB socket carries both functions.
WSJT-X is one established application that includes WSPR. Dedicated WSPR transmitters and small computing systems are alternatives, but their configuration and frequency calibration differ. Start with the equipment you can configure reliably instead of buying an entire automated station for the first experiment.
Use a dummy load when checking transmitter settings without radiating. A receive-only session needs no transmit drive, PTT activation or antenna power rating beyond its receiving application. Once transmitting, every component in the RF path must support the actual output and the long keyed interval.
Before connecting anything, identify which device controls push-to-talk, where transmit audio enters the radio, and which sound input receives radio audio. This prevents the computer's microphone or notification sounds from becoming the unintended radio source.
Set Identity, Time and Radio Control
Enter your actual callsign and the locator for the operating position. A home locator is wrong when the transmitter is at another site. Basic WSPR messages use a four-character locator, while software may retain a more precise locator in other settings. Unusual or compound callsigns can require the software's supported message formats; do not shorten a legal identity arbitrarily to make a field accept it.
Synchronize the computer clock to a reliable time service and check that synchronization has succeeded. WSPR depends on coordinated UTC periods. Selecting the correct local time zone does not by itself make an inaccurate clock accurate. If decodes fail, inspect the clock offset before adjusting the antenna.
Configure the radio model, control port and PTT method according to the WSJT-X and radio manuals. Test CAT control if you use it, then confirm the displayed band and frequency on the radio itself. Select the correct input and output audio devices explicitly. A laptop docking change can silently switch the default device.
In WSJT-X, choose WSPR from the Mode menu and begin with transmitting disabled. The developer guide describes a two-minute receive period started with Monitor and separate controls for enabling transmissions.
Find the Right Frequency Without Confusing Dial and Signal
Use the software's current WSPR frequency list, the applicable band plan and your own license privileges together. A software menu is a technical preset, not permission to transmit. US Technician HF privileges, for example, do not authorize arbitrary HF digital operation wherever an application offers a frequency.
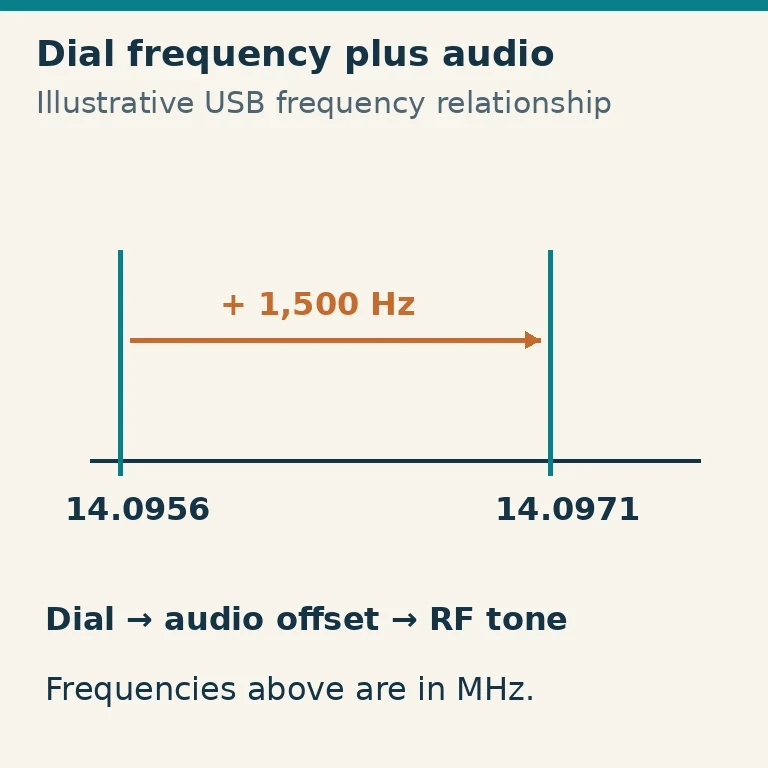
The WSJT-X guide gives 14.0956 MHz as an example WSPR dial frequency. With USB audio at 1,500 Hz, an illustrative RF tone is at 14.0971 MHz: the dial frequency plus the audio offset. WSPR's actual modulated signal occupies a small span around its selected audio position. Moving the radio dial directly to the reported RF frequency while leaving the audio offset unchanged moves the transmitted signal again.
Use USB or the radio's appropriate data mode as specified for the setup. Set receiver bandwidth wide enough for the WSPR activity being monitored. An unnecessarily narrow CW filter can exclude signals even when the dial looks correct.
Do not copy a 60-meter preset without checking local channel, bandwidth and operating restrictions. Regional allocations and permissions differ, and the WSJT-X guide specifically warns about lawful frequency selection on that band. The applicable US Part 97 provisions were checked on October 29, 2026.
Receive First and Prove the Audio Path
Connect the antenna, select a supported band with likely activity, click Monitor and allow complete receive periods to finish. Decodes normally appear after a period, rather than immediately when a signal first becomes visible.
Adjust radio and computer receive levels using the application's guidance. Avoid an overloaded input, aggressive noise processing or a noise gate that removes weak signals. More audio gain is not always more sensitivity: clipping distorts the information the decoder needs.
If you see signals but decode nothing, check timing, frequency, mode, audio sample configuration and receiver processing. If you see no signal or noise change at all, check the selected sound device and audio routing. A live waterfall is evidence of input activity, but it might be the laptop microphone rather than the receiver. Disconnecting or changing the radio audio level should produce the expected response.
Enable online reporting only after identity, locator and time are correct. Give an internet report time to appear, and distinguish a locally decoded record from successful network delivery. Keep a few received examples with their UTC times as your baseline.
Make a Low-power Transmitting Trial
Choose an output appropriate to your radio, antenna, local conditions and license. The US rules require the minimum transmitter power necessary for the desired communications, within applicable limits. WSPR's purpose does not require turning a 100-watt transceiver up to its maximum.
Set power using the radio controls and an appropriate power indication or meter. Adjust transmit audio so the signal remains clean, following the radio's data-mode and ALC guidance. A universal “zero ALC” recipe does not fit every radio. Disable speech processing and avoid clipping the audio path.
The WSPR power field reports power; it does not set the transmitter. Enter the actual approximate RF output in dBm. One watt is 30 dBm, 100 milliwatts is 20 dBm, and five watts is approximately 37 dBm. Selecting 30 dBm in the software while the radio produces five watts sends an inaccurate report rather than reducing output to one watt.
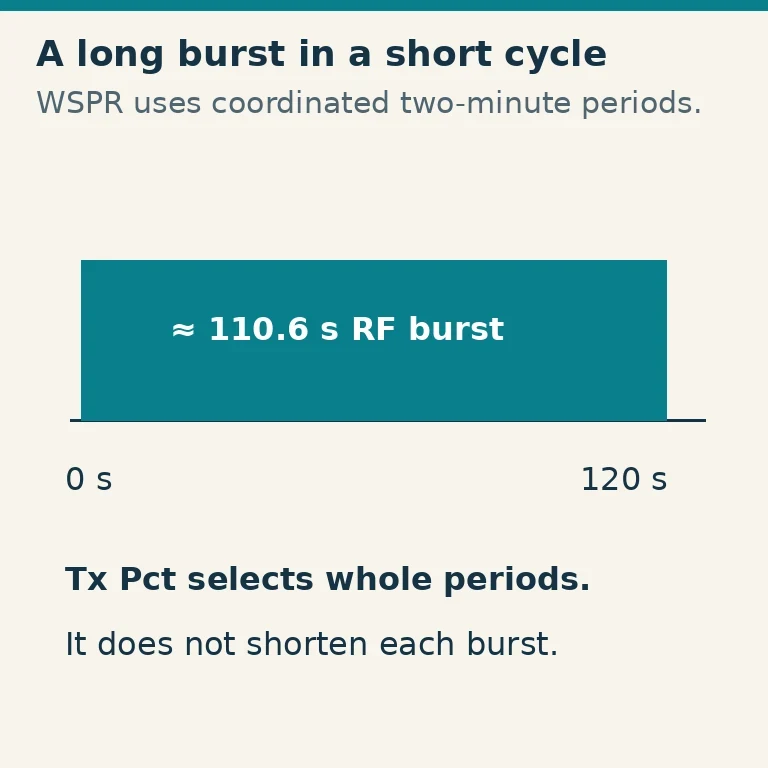
Select a modest Tx Pct and enable transmission while watching the first complete cycle. The control sets the average percentage of two-minute sequences used for transmitting; periods are chosen randomly. It is not an instruction to key for that fraction of every burst. A WSPR transmission lasts about 110.6 seconds, so a low long-term percentage still includes a sustained load. Check radio temperature, power supply and antenna matching during that interval.
Read the Results Without Overclaiming
Filter the reporting display by your callsign, band and a recent UTC interval. Check which receiver reported you, not just how long a line crosses the map. A single receiver with a good antenna can explain a striking result.
Compare SNR at the same receiver on the same band when evaluating changes. Reports from different receivers combine different antennas, noise environments and equipment. They are not calibrated measurements of your station's absolute signal strength.
For an antenna trial, keep output, band and reporting window comparable. Try antenna A, then B, then A again if practical. The second A sample helps reveal changing propagation. Even then, treat a handful of reports as observations rather than a conclusive antenna ranking.
Save timestamps, antenna details and actual power alongside results. Report counts alone can change because more receiving stations came online. A useful first experiment answers a narrow question, such as whether a repaired feedline restored reports at several regular receivers.
Troubleshoot One Failure at a Time
| Symptom | First checks |
|---|---|
| No input activity | Correct sound device, cable, receiver audio output and band |
| Signals visible, no decodes | Accurate UTC, correct mode and dial, unclipped audio, stable frequency |
| Receives but never transmits | Enable Tx, Tx Pct, PTT/CAT operation and permitted transmit interval |
| PTT operates, no RF | Transmit audio route, radio data input, drive and power settings |
| RF present, no remote reports | Antenna, actual frequency, frequency stability, receivers, propagation and reporting delay |
| Reports show wrong position or power | Locator and reported dBm; those fields do not measure the station automatically |
Change one variable, observe several complete periods, and write down what changed. Stop transmission if the radio overheats, output becomes unstable or the antenna system behaves unexpectedly. Do not leave a new automated setup unattended just because its first report looked good.
For a first evening, receiving several stations and making a few accurately described low-power transmissions is a useful result. WSPR becomes more informative when you repeat a controlled observation and learn which part of the station or path the reports actually describe.